Following up on this post. I am actually moving closer to work (~3 miles!) so am excited that it will only take 15-20 mins to bike to work. Unfortunately since I am a contractor at a company here in northern VA, I do not get access to the locker room/showers. I guess I will be keeping my stinky bike clothes at my desk, tucked away in a drawer somewhere.
I saw some great recommendations on panniers. I am going to check them out. Are you able to store your laptop in those? My only concern would be if I fell, the laptop would most definitely break.
Also, can anyone suggest a bike odometer?
I recently started biking to work (about 3 miles one way also). I carry a laptop, lunch, and change of clothes in a laptop bag that I modified into a pannier for less than $10 using items from Home Depot.
This is great - the cost of the ortleib panniers are pretty high. How did you go about making your own?
Any half decent set of panniers is going to cost an arm and a leg. I am still looking for the perfect set, but until I do, I need something to use temporarily. Although, if I find a bag that I like, I feel I can just make another one (obviously put a LOT more effort into it than I did with this one).
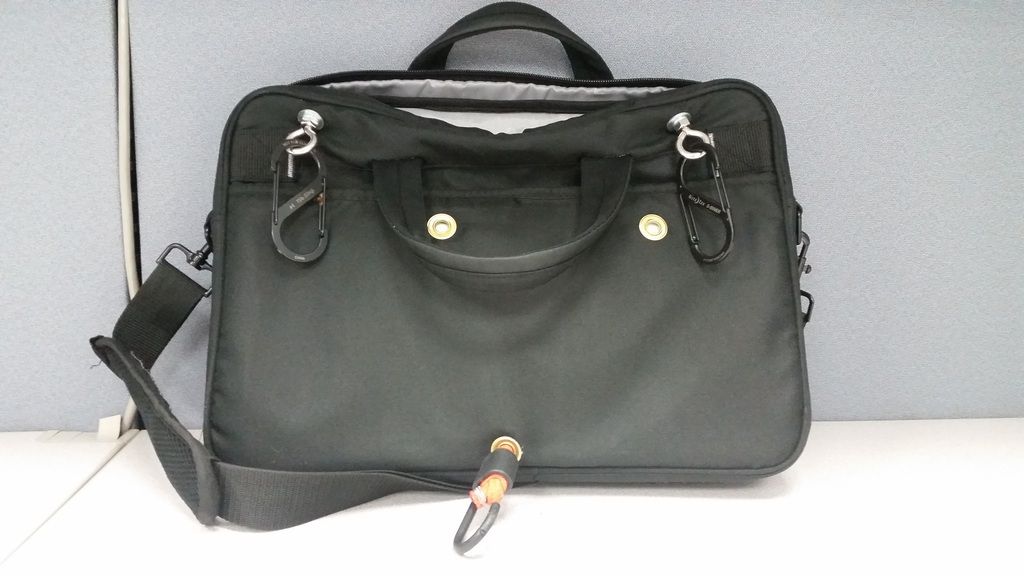
My laptop bag conversion is a total hack job, but it actually turned out better than I expected, minus the mistakes you'll see in the picture LOL - two unused grommets...I initially wanted the hooks to go there but it didn't work out too well that way.
What I did:
- got some threaded screw eyes, nuts, washers (1/4" I think)
- put two holes in the bag using a screwdriver (eyeballed the position/location)
- took a piece of foam core and sized it to fit the small, back, inner pocket - there's a zipper right below the handle there...you can use plywood or anything that's somewhat firm. If you look at the two grommets that don't belong there, there's a white patch you can see through them - that's the foam core that fills up the entire back of the bag.
- put a grommet at the bottom and put a hole in the foam core that lines up with the grommet...the grommet set turned out to be the most expensive part of this whole operation ($6 at Lowes)...and I only ended up needing 1...doh.
- took a bungee cord, snipped off the end, threaded it through the foam core and grommet, tied a knot and singed the end with a lighter. The bungee cord is for hooking the bag to the bottom of the rack so that it doesn't swing back and forth.
- hooks - you can use whatever you like really. My hooks actually go on the other side of the rack, and the screw eyes essentially "rest" on the rack - I have not felt the bag shift at all during my rides so far.
If you need more ideas, you can try Googling "DIY panniers," I basically looked at what other people did, went to Home Depot/Lowes to see what accessories they had, and just went at it.
Pic for your viewing pleasure:
]
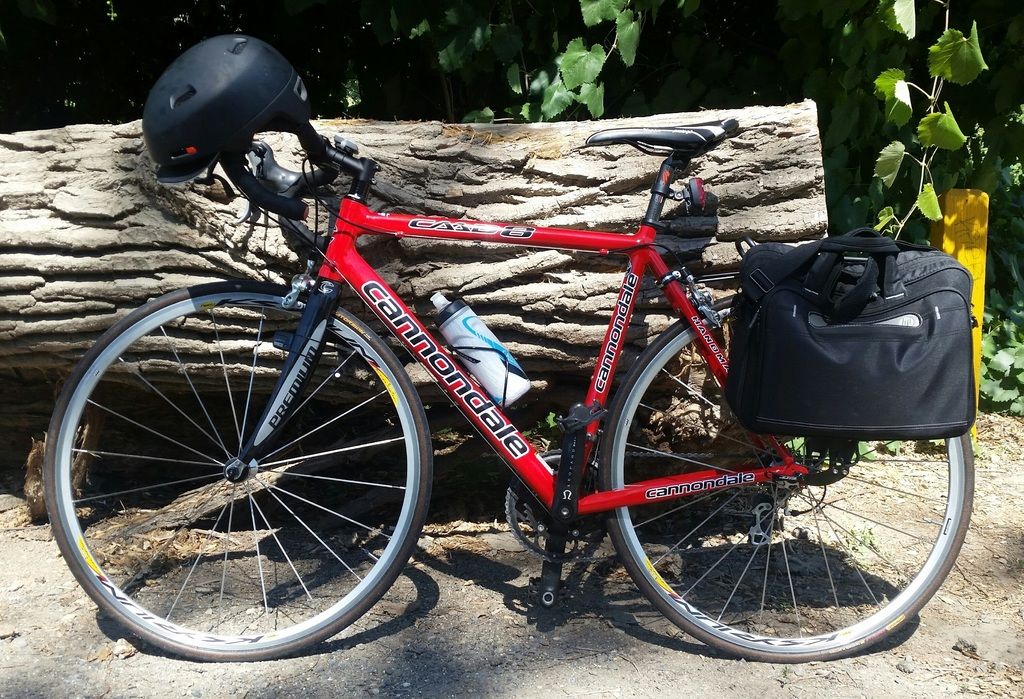
*Edit added pic of the pannier attached to the bike

